How to make lined curtains
My very dear friend Lizzie is having a baby boy in a matter of weeks and the nursery is all ready! So exciting! All it needs is a pair of curtains to help the little one sleep. Very important! I've never made curtains before so it was great to get a chance to learn, Mrs Fieldsend and I set to work on teaching ourselves in the hope of ensuring a full nights sleep for the future Fieldsend mummy.
You will need
TAPE MEASURE
CURTAIN FABRIC
CURTAIN TAPE
CURATIN HOOKS
LINING FABRIC
MATCHING COTTON
SEWING MACHINE
IRON & IRONING BOARD
PINS/ NEEDLES
Step One
Measure very carefully before you buy your fabric and lining! Measure the width of your curtain rail and the vertical drop, (decide on where your curtains should fall to). You will need to to multiply the width by 1.5 and add 5cm for seam allowance. For length add 15cm to to ensure you have enough at the top and bottom for hems. It gets more complicated if your doing a large window with patterned fabrics, if this is the case you will need to look at how wide the roll of fabric is and how often the repeat in the pattern is to get it all lined up.
Step 2
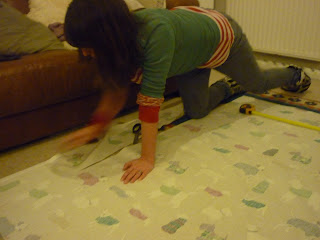
After you've bought your fabric it's time for some very careful measuring and cutting! In this case our window was 150cm wide and the drop was 146cm.
Now clearly we want two curtains in the window. So each curtain should be 75cm wide in the end, this means we need each curtain to be 75cm x1.5 = 112.5cm plus 5cm seam allowance. we will therefore be cutting the fabric to be 117.5cm wide. The lining fabric should be 5 cm less wide than the curtain fabric to allow for a neat edge 112.5cm wide. The curtain fabric needs to be 15cm longer than the drop your planning for, but the lining fabric only needs to be 12.5cm longer, this will stop the fabric getting all bunched up at the bottom. We are therefore very carefully measuring and cutting: Curtain fabric 117.5cm x 161cm, Lining Fabric 112.5cm x 158.5cm. Mark it all carefully with chalk and then cut.
Step 3
Line up one side of lining on top of curtain fabric, make sure the sides you want showing are facing inwards (a bit like an enormous pillowcase). The curtain fabric should line up with the lining at the top and be 2.5 cm longer at the bottom. Pin carefully all the way along the side hem, making sure the pins are at a right angle to the edge so you can sew over them easily. The lining is also 5cm less wide than the curtain fabric, so don't worry that it doesn't sit flat. Line up the second side seam and pin it. Do the same on the second curtain.
Step 4
Sew over the pins ensuring you leave a 2.5cm seam allowance, make sure you do a back stitch at the beginning and leave about 5 cm at the bottom end of the seam not sewn, this makes folding the hem easier.
Step 5
Cut small traingles at regular intervals out of the seams to help it sit straight
Step 6
Press seam open.
Step 7
Turn it the right way round and press it so that approx 2.5cm of curtain fabric frames the lining on the back of the curtain. Press the whole curtain at this stage too, it's important you keep ironing the whole curtain as you go, this will ensure that there are no baggy bits!
Step 8
Measure 5cm down from the top of the curtain and mark clearly.
Fold this fabric in on itself and press. Pin the curtain tape onto the top of the lining side ready for sewing, again ensure pins are at a right angle to the edge.
Step 9
Sew the tape on neatly in a straight line at the top and bottom of the tape. Leave one side of the tape open.
Step 10
Measure 5cm from the hem of the curtain fabric, fold and press. Repeat this so that it's doubled over and pin. Do the same with the lining fabric
It should sit like this, with a small opening at the side that will need hand stitching
Step 11
Hand stitch the hem from the back so that you are just catching the curtain fabric, you shouldn't see the stitching from the front. There will be some hand sewing on the hem at the sides to ensure your lining sits flat on the curtain fabric and is finished neatly.
Step 12
Cut the strings on the curtain tape on the side you left open, gather to the correct width. Tie the strings and tuck the ends in behind the curtain tape. Hand sew shut.
Step 13
Attach the curtain hooks to the middle band on the curtain tape at regular interevals.
I can't wait to see them up in the nursery ready for baby F! I'll post a picture when I get one, I think I may make some 5minute cushion covers to match with the spare fabric!


Good one Nicky no nice. Thanks Daddy Fieldsend
ReplyDeleteI am so excited ... They look amazing!! I can't wait to see them!! You are the cleverest bean in the whole kingdom!! Lots of love mummy to be fieldsend!!! Xxxx
ReplyDelete