Wednesday 2 November 2011

All sorts of things grow in my bathroom!

Mildew, cobwebs........no trees!

In my bathroom a miracle has occurred! A tree has grown! It's taken a while of course, they grow from acorns don't you know! The summer was full of stunning weddings, Chris excelled himself with baking two wedding cakes! I have spent the summer gardening, and preparing for my new job which I started in September. I have of course neglected to record and share any of my little projects, jam, harvest time, table plans, printing, set building. Last time I wrote I'd visited Charleston with my friend Helen Tovey. This is the next stage in my bathroom madness! And although my bathroom is still mdf hell it's getting there!

The tree was drawn in dry wipe pen then painted in tile paint. Tile paint is the worst product I have ever come across in my life! It just does not work at all! Do not use it. After 3 dreadful, drippy, yucky coats of tile paint I switched tack and used exterior gloss for metal as recommended in my hardware store. 

I then completed detail in acrylic and covered it in 3 coats of yacht varnish, I don't know how log it will last! Probably just as long as it takes for Chris to get totally sick of it and re tile! Not long then!

Next will be to mosaic the floor! Am I cracking up.....get it.....cracking up......mosaic.......oh well never mind!

Tuesday 7 June 2011

A tribute to Vanessa Bell

Painting Furniture


I hate my bathroom! I mean really despise it! It's white plastic, lino covered and horrible! For this reason my beloved husband is planning on it being his next DIY mission, after he finishes the beautiful kitchen that is. Over the royal wedding weekend I went with my dear friend Helen to the stunning Charleston House, centre of the Bloomsbury Group and Duncan Grant and Vanessa Bell's family home. An artists' house that is full of life and love, a truly restful place that feeds your creative imagination. It's just outside Lewes and we went on a lovely sunny Sunday, the carrot cake is not to be missed! The decor of their home is truly inspiring and I came home full of beans ready to paint everything and anything! Perhaps because Chris is planning to rip out the bathroom soon he told me to go crazy and enjoy it! Helen looked a little skeptical, the Charleston look is a little eccentric in it's ways and possibly not entirely suitable for my 60s build flat! Undeterred however I got stuck in!

Firstly I primed the white plastic cupboards with PVA or undercoat if you'd prefer. Then I painted the furniture with 3 coats of bathroom paint. 


I pencilled in my design and then with some white acrylic paint I painted free hand. You could use stencils but the Charleston look is a little lopsided and faded so I chose to go with this feeling!


This is when I really started to worry that my bathroom now looked like a crazy person lived in the cupboard!


I kept with it and painted the second layer in dark grey acrylic.


Following this I applied 2 coats of Yacht varnish


I do not love my bathroom yet! I think the tiles need painting and that new taps would suit the style better, I also want to create a mosaic on the floor. However I'm pleased with the quirky results and think it's on it's way!
Dressed with jugs and brica-brac I now have my own little piece of Charleston interpreted by me.


Monday 30 May 2011

Elderflower Cordial


900g/ 2lb caster sugar
30g citric acid
1 lemon
1 orange
10 large elderflower heads, washed and drained

Elderflower is so beautiful and grows absolutely everywhere, so access is easy. My ma lives in Tulse hill in London and made a huge batch, so whether you live in the city or the country it is blooming everywhere. I picked mine from my back garden and I can't tell you how wonderful the scent of the basket was . It's so easy to make cordial and it can be used in lots of ways, in champagne, lager, on yoghurt, in salad dressing or as a marinade on a fruit salad.

1) Put the sugar in a large heatproof bucket and add 600ml/1 pint of boiling water. Stir until dissolved and add citric acid. It can be quite hard to track down citric acid, it should be available from all chemists and brewing shops but it often sells out at this time of year. Chemists can only order in so much as naughty folk use it to cut drugs so don't be suprised if you get the odd askew glance as your desperately trying to track it down!


2) Grate the rind of a lemon and orange and add to mix, then slice the fruit and add that too. Put in the elderflower heads until they're submerged. Cover and allow to stand overnight or for around 12 hours. The sweet heady smell will completely dominate your house.  Strain through muslin and bottle. Ensure your bottles are thoroughly cleaned and bottles are sterilised by placing them in the oven at 100 degrees for 15 mins, soak the caps in boiling water.


Enjoy! It's a lovely gift too so make a big batch and hand it out to your friends.

Thursday 14 April 2011

Easter Fun! Blowing eggs

Blowing eggs for rainy day fun and Easter decorations

This Easter holiday my beautiful nieces came for a visit with my sister in law and her husband. Although the weathers been glorious we were not bestowed with the warmest of temperatures but we entertained ourselves in truly seasonal fashion with egg hunts, egg painting and baking hot cross buns. Chris threw down the gauntlet and challenged everyone to an egg painting contest! The challenge had been set so I prepared the eggs for the following day. Firstly you need some ordinary eggs, in this case supplied by Marilyn, Clivetta and Wilson. Make a hole with a pin in both ends, if you see a small freckle this usually means there's a flaw in the shell and it's easier to get the pin in.

Make one of the holes slightly larger by wiggling the pin about. Poke a a cocktail stick inside and whoosh it about to break the yoke. Now for the gross part! Blow into the small hole to push all the gunk out.

Give them a rinse and leave them to dry over night.

You can decorate them anyway you like, I got a table of stuff out; paints, glitter, sequins, tissue paper etc.

It was very fun and some people eggselled themselves, they were just eggsellent creations, the whole thing was very eggciting! My brother in law especially created an amazing footballer Eggar Davids with dreads and everything!

Saturday 9 April 2011

Making my mark

There is a brilliant wood reclamation yard behind the art school in Brighton called the wood store. My lovely husband has been converting our soulless kitchen into something much more beautiful using the amazing trunk slices they sell relatively cheaply. 


The piece we bought had beautiful bark which we kept as the edge of our new work surface. Chris sanded it down and oiled it with danish oil, he added this splash back today and let me make my own mark! Like a naughty child I carved our name in the wood just like in those old desks we used to have in primary school. Chris then oiled it to bring out the colour. It's a little messy but I sliced the main incision straight down then carved in as neatly as I could on either side at an angle. Everyone should carve their name in wood I feel like it will last forever, a time capsule to the future!

Thursday 24 March 2011

Don't pin it on me!

Do you remember those military cap badges? Finally I started to play with fabric to compliment them, this is really good in front of telly work too, nice and calm and slow, (unless your watching 'Waking the Dead' and then it's just a good way to be distracted from the scary bag man!). I wanted to use rich fabrics that reminded me of naval lapels and royal sashes. Here is what I did if you fancy having a go.


To begin with I cut out some petal shapes from the curtain fabric and blanket stitched them to a small piece of maroon chord. I made a floral shape and cut it out of the fabric. I really liked the slightly frayed edges of the petals but if you didn't you could iron it with some bondaweb first.


I cut out some red paisley fabric the same size and hand stitched it right sides together leaving a small gap. I then turned it inside out and hand stitched the gap closed.

I had some gold embroidery thread which I couched around the edge of the petals and into a spiral in the middle. My mag pie obsession for bits and pieces came in handy here and I couched an old chain into the centre too so it hung away from the flower.


I then added a few more bits and bobs from old bits of jewellery and the military cap badge in the centre. Then carefully I hand stitched the edges of the petals together so the flower would become more 3d.

I added a brooch attachment to the back so that it could be pinned on as a brooch. This one is a present for my friend Amy who has just moved to Norwich. It's a bit late but I hope she likes it.


Sunday 13 March 2011

Bags of fun on a rainy afternoon.......

A step by step guide to making a pretty little bag


You will need:

0.5 metres of any fabric
0.5 metres of any other fabric
Matching thread
2 buttons
Small amount of bondaweb 
And some bits and bobs! Collected buttons, jewellery, vintage fabric and scraps of pretty fabric that you like.

This bag is basically a simple lined tote design with slightly sloped sides. I love all fabric and  enjoy putting it together! I often get carried away with the amount of diferent fabrics I use, I think this is because of a love of patch work quilts. I always begin by going through my fabric boxes and finding a few bits that work together. Laying everything out on the floor. This is why I have a ridiculous amount of baskets and bags filled with fabric, beading, thread and buttons. Most of these are bought at car boot sales, flea markets or the famed sunday market, however some fabrics are left over from more organised projects. If you're worried a good way to choose a colour scheme is to buy a small vintage handkerchief or old printed cloth and use the colours from that, you can then take this to a haberdashery and buy a few bits in those colours. I am obsessed with selvedges and ensure that I keep these whatever I am making.   


The fabric I am using is some thick upholstery fabric I bought from a car boot, you can see both sides of it above. I'm going to use it inside out as I love the rusty colour. The maroon chord is for the lining and is left over from the Christmas stockings I made this year. I bought the old handerchief in Lewes amongst a bag of linen some time ago and the rest is scraps from various patchwork projects.

1) Decide the size and shape you want your tote and draw it out on folded newspaper add 1.5cm as a seam allowance all the way around, cut on fold and open up so pattern piece is symetrical (A). Decide how long you want your strap, I suggest 60cm long 8cm wide, draw and cut out of newspaper (B). Cut out another template for fastening the button that is 20cm by 8cm (C).  


2) It is up to you which fabrics you use for what, try not to plan too carefully enjoy it and see what happens. Pin templates carefully to fabric before cutting out, alternatively draw around in chalk aiming to get as much as possible out of your fabric.
Cut 2 x (A) for lining maroon chord and 2 x (A) for outside of bag upholstery fabric. Cut 1 x (B) upholstery fabric and 1 x (B) maroon chord. Cut 1 x (C)  uphosltery fabric and 1 x (C) maroon chord.


3) Cut out some shapes in different fabrics and lay them on your fabric to see what you like. I know your supposed to use bondaweb but i'm a bit of a bodger the truth be told and never do! However I suggest you cut around your applique shapes on some bondaweb and steam it on to your shapes, peeling off the backing and sticking it in place onto the fabric, (I just pin mine but it's better the proper way!). Now zig zag using a satin stitch around the shapes, (satin stitch is a zig zag with a very short stitch length).  I decided to use this embroiderie anlglais hanky for a pocket on the front, I put a button hole on it and stitched a ribbon along the top. I'll talk about button holes in a bit!


4) Do a quick zig zag stitch around all your cut pattern pieces. Pin together (A) lining and (A) outside of bag right sides together. Make your pins at a right angle to edges and you can just sew right over the top. Make sure you do a back stitch at the the start and finish to secure it. Leaving a seam allowance of 1.5 cm sew pieces together. Turn the outside of your bag the right way out and press it flat put the lining snuggley inside.

5) Pin right sides together (B) and (C) sew one side only together leaving 1.5cm seam allowance. Press seam open and bind the other raw edge with a strip of fabric. The reason I do this is that the upholstery fabric and chord are very stiff and it will be very difficult to turn inside out. What i mean by binding is; get a strip of another fabric the same length and 5cm wide. Fold over each edge 1cm and steam down then fold in half and press again. Put this around your raw edge and stitch it along the edge holding it in place with pins at a right angle. This (I think) is a pretty and easy way to incorporate another fabric and I do it in lots of places where there is an unsightly edge! Complete the same process with (C). If you have a thinner fabric and would like to you can sew both edges of (B) or (C) and turn it inside out using a knitting needle, ironing flat afterwards.


6) Mark how big your button is on the end of (C), if you have a button hole setting on your machine this is dead easy! However my ancient beast does not! So I do a narrow satin stitch along the line I drew. I then widen  the stitch at the end doing a few on the spot and go back the other way, widen it at the other and and do a quick back stitch. I now cut the button hole open  


6) Now here is where I cheat again i'm afraid and the selvedges I was talking about really come in handy! I hate this bit of making a bag, (I really do!) I always mess it up as I'm not naturally patient and it's fiddly! So this is what I do, (shhh don't tell anyone!). I do a wide zig zag with a short stitch length all the way round the top of the bag sewing the lining together with the outside. I then cut a wide band approximately 7 cm wide off the selvedge of my upholstery fabric it's the same in length as the circmference at the top of my bag plus 3cm. I seam the edges of the band togther right sides together so it's a big loop. I then  pin it to the inside of my bag at the top. I sew this as a seam all the way round the opening  of the bag . I then fold the selvedge band over the top of my messy zig zag edge and pin. At this point tuck your button strap underneath the selvedge binding  and sew the selvedge flat along the outsde of the bag, this will sew your buttin strap in too. Basically you've sewn a strip onto the top of the bag and folded it over like a collar, then sewn it down to hide the mess underneath! 

7) Bind the ends of your strap in the same way described earlier. Hand stich onto your bag. I added a junky brooch here too. Sew your buttons on securely in place and hey presto! I'm going to give this to my Ma as a birthday present and she's promised faithfully she will not look at this! So if your reading this Mother you are bad!!!!


Sunday 27 February 2011

pull yourself together man! A step by step to making lined curtains

How to make lined curtains

My very dear friend Lizzie is having a baby boy in a matter of weeks and the nursery is all ready! So exciting! All it needs is a pair of curtains to help the little one sleep. Very important! I've never made curtains before so it was great to get a chance to learn, Mrs Fieldsend and I set to work on teaching ourselves in the hope of ensuring a full nights sleep for the future Fieldsend mummy.

You will need

TAPE MEASURE
CURTAIN FABRIC
CURTAIN TAPE
CURATIN HOOKS
LINING FABRIC
MATCHING COTTON
SEWING MACHINE
IRON & IRONING BOARD
PINS/ NEEDLES

Step One
Measure very carefully before you buy your fabric and lining! Measure the width of your curtain rail and the vertical drop, (decide on where your curtains should fall to). You will need to to multiply the width by 1.5 and add 5cm for seam allowance. For length add 15cm to to ensure you have enough at the top and bottom for hems. It gets more complicated if your doing a large window with patterned fabrics, if this is the case you will need to look at how wide the roll of fabric is and how often the repeat in the pattern is to get it all lined up.

Step 2
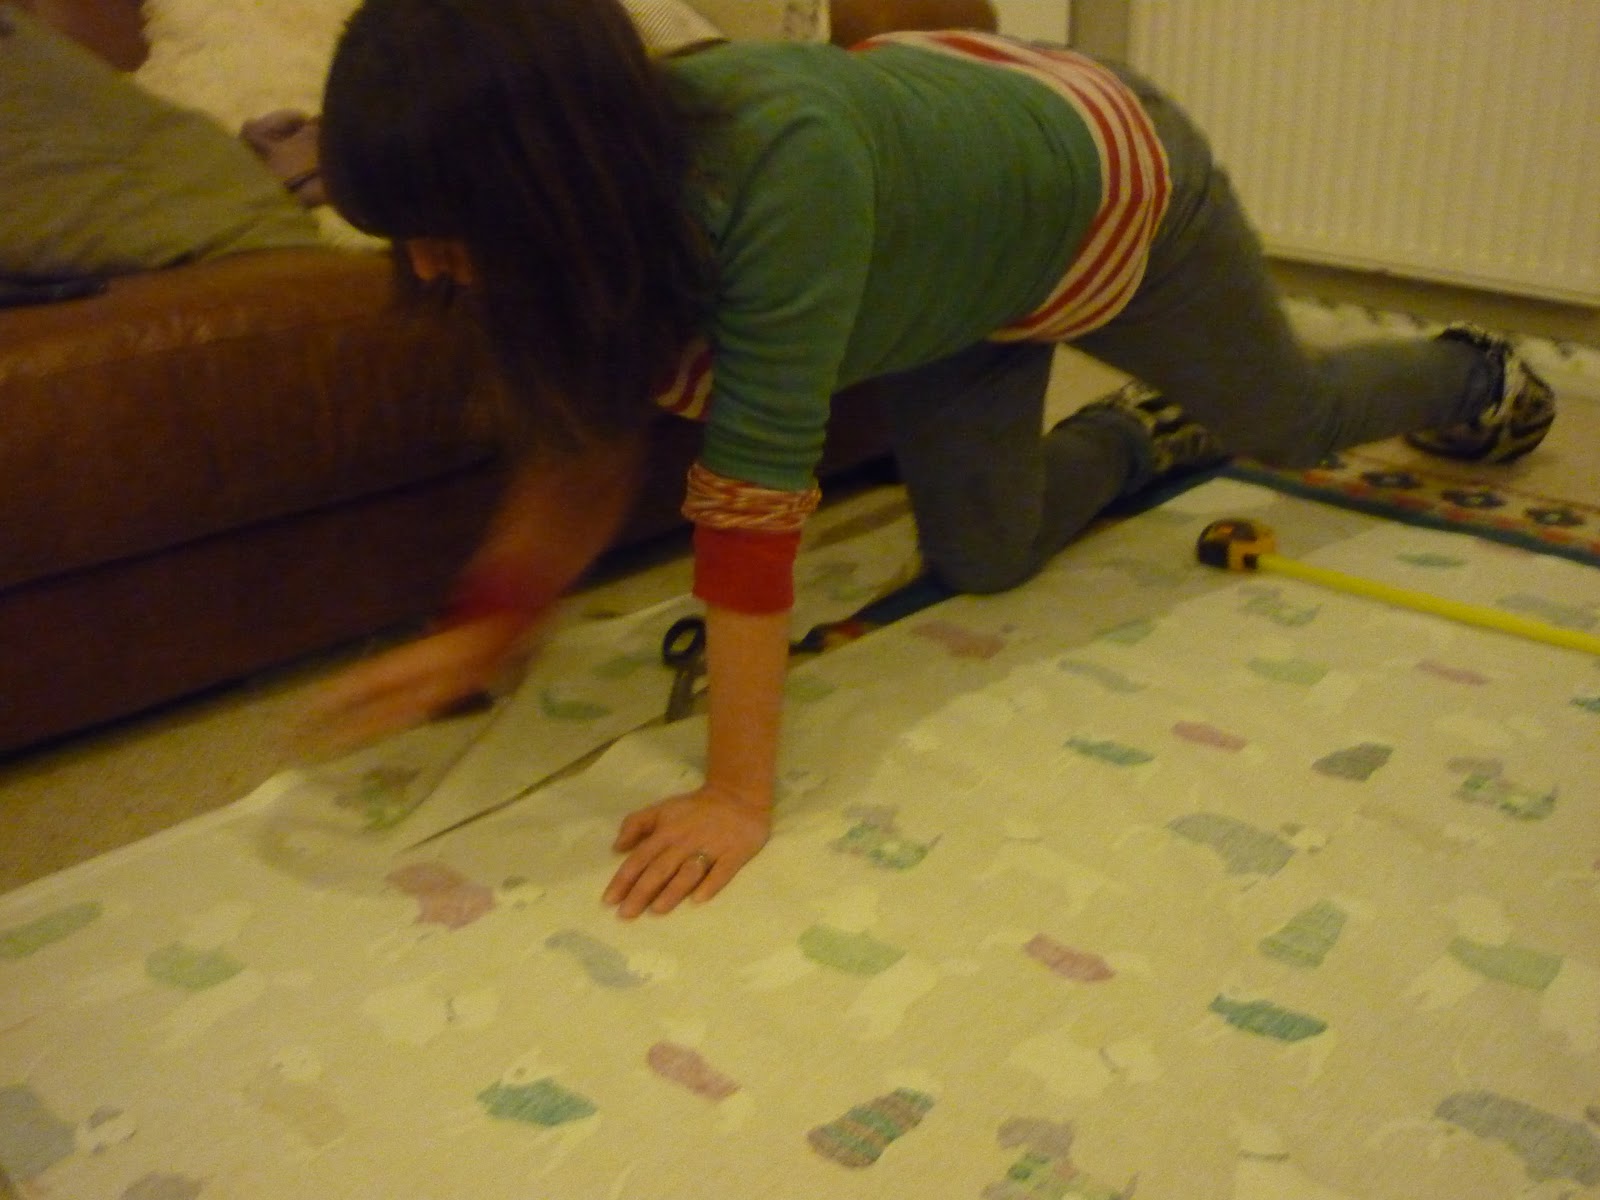
After you've bought your fabric it's time for some very careful measuring and cutting! In this case our window was 150cm wide and the drop was 146cm.


Now clearly we want two curtains in the window. So each curtain should be 75cm wide in the end, this means we need each curtain to be 75cm x1.5 = 112.5cm plus 5cm seam allowance. we will therefore be cutting the fabric to be 117.5cm wide. The lining fabric should be 5 cm less wide than the curtain fabric to allow for a neat edge 112.5cm wide. The curtain fabric needs to be 15cm longer than the drop your planning for, but the lining fabric only needs to be 12.5cm longer, this will stop the fabric getting all bunched up at the bottom. We are therefore very carefully measuring  and cutting: Curtain fabric 117.5cm x 161cm,  Lining Fabric 112.5cm x 158.5cm.  Mark it all carefully with chalk and then cut.


Step 3
Line up one side of lining on top of curtain fabric, make sure the sides you want showing are facing inwards (a bit like an enormous pillowcase). The curtain fabric should line up with the lining at the top and be 2.5 cm longer at the bottom. Pin carefully all the way along the side hem, making sure the pins are at a right angle to the edge so you can sew over them easily. The lining is also 5cm less wide than the curtain fabric, so don't worry that it doesn't sit flat. Line up the second side seam and pin it. Do the same on the second curtain.

Step 4
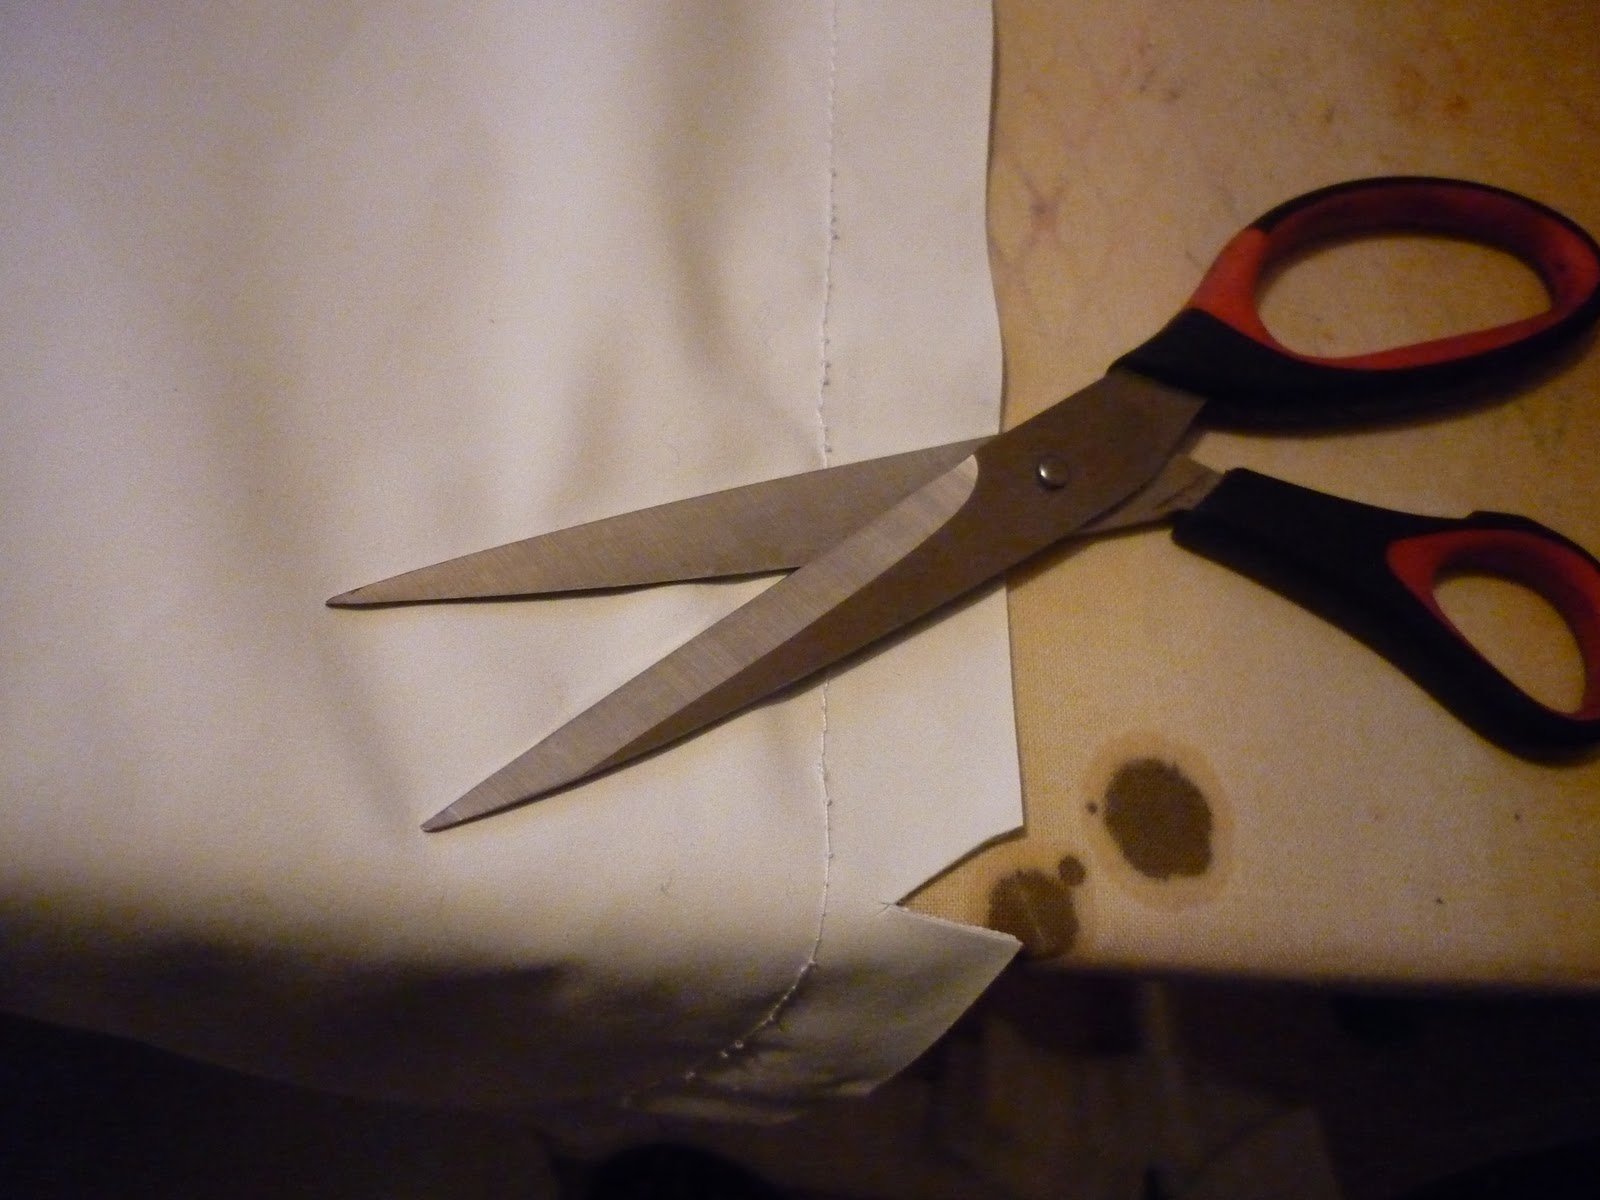
Sew over the pins ensuring you leave a 2.5cm seam allowance, make sure you do a back stitch at the beginning and leave about 5 cm at the bottom end of the seam not sewn, this makes folding the hem easier.


Step 5
Cut small traingles at regular intervals out of the seams to help it sit straight


Step 6
Press seam open.

Step 7
Turn it the right way round and press it so that approx 2.5cm of curtain fabric frames the lining on the back of the curtain. Press the whole curtain at this stage too, it's important you keep ironing the whole curtain as you go, this will ensure that there are no baggy bits!

Step 8
Measure 5cm down from the top of the curtain and mark clearly.


Fold this fabric in on itself and press. Pin the curtain tape onto the top of the lining side ready for sewing, again ensure pins are at a right angle to the edge.


Step 9
Sew the tape on neatly in a straight line at the top and bottom of the tape. Leave one side of the tape open.

Step 10
Measure 5cm from the hem of the curtain fabric, fold and press. Repeat this so that it's doubled over and pin. Do the same with the lining fabric
It should sit like this, with a small opening at the side that will need hand stitching


Step 11
Hand stitch the hem from the back so that you are just catching the curtain fabric, you shouldn't see the stitching from the front. There will be some hand sewing on the hem at the sides to ensure your lining sits flat on the curtain fabric and is finished neatly.

Step 12
Cut the strings on the curtain tape on the side you left open, gather to the correct width. Tie the strings and tuck the ends in behind the curtain tape. Hand sew shut.


Step 13
Attach the curtain hooks to the middle band on the curtain tape at regular interevals.


I can't wait to see them up in the nursery ready for baby F! I'll post a picture when I get one, I think I may make some 5minute cushion covers to match with the spare fabric!